Honing and Toning My Bottom
The most significant repair -- and the priority job at the top of my list -- involved fixing the damage to the front of the keel, where we struck that uncharted rock last year. But before I could get to it, I first had to raise the boat just a tad using the adjustable-height boat stands, then move the wooden keel blocks (upon which the boat effectively rests) back a few inches, before lowering the boat back down again. That was a breath-holding exercise.

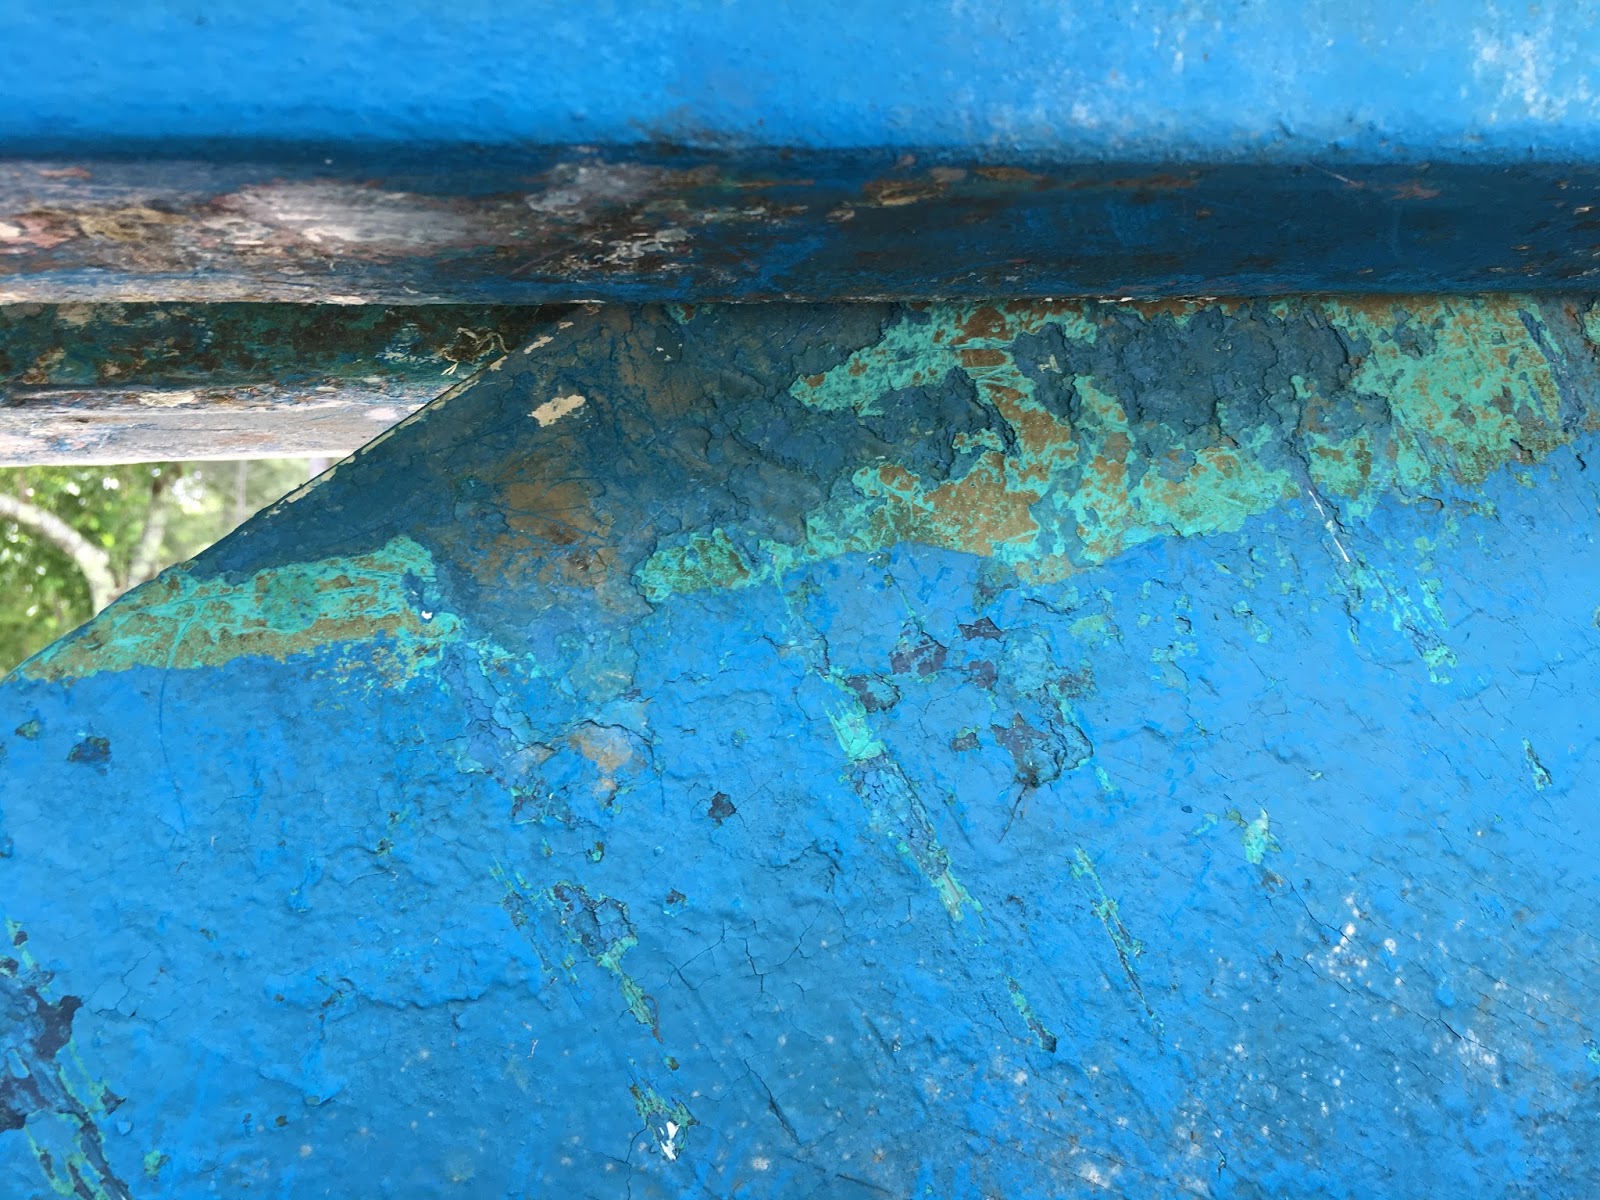
Damaged keel, now fully exposed and accessible....
My friend, Ric, lent me some West System epoxy. Following his advice, I mixed it to a oatmeal-like consistency, using "mmmmm about so much" microfiber adhesive filler.

Note to Self: epoxy bonds work through a chemical reaction, which gives off heat. If you mix this stuff in a plastic SOLO cup, the plastic cup will melt. If you mix it in a glass jar, the glass jar will get very HOT....
Then, using a wooden spatula, I began to apply epoxy to the damaged area of the keel, smoothing it out with an old plastic credit card. I forgot all about gravity, of course, so it got kinda drippy and lumpy as it hardened. But I did have two good science lessons during this repair job: heat and gravity.

I had to put on several separate coats, waiting for each one to dry and cure. This meant I went through a bunch of plastic SOLO cups. No beer pong for a while.

Note to Loved Ones: a power sander (with an interchangeable buffing head) would be a great man-tool gift next year (if any of you are reading this)....
Finally, I put on goggles and a gauze face-mask, and got to work hand-sanding the patch to smooth it out and shape it to the contours of the keel.

Hand-sanded to shape....
Finally, I covered the patch with a coat of marine ablative paint.

Good as new -- sort of....
The touch-up didn't exactly match the hue of the older bottom coat (from the same can of paint), but it is below the waterline -- who will notice?
While I was down there working on the keel, I also thought it best to clean and touch up the centerboard. Last fall I purchased some additional wood blocks from a small sawmill in a nearby town, and was able to set the boat a little higher on the stands to enable better access to the centerboard. The recess in the keel was fouled with a thick collection of barnacles, which I dislodged with a plastic ice scraper (they are easier to remove once they are dead and dried).

It has been a loooooooong time since anyone cleaned up in there....
The pendant is in reasonably good shape, but the board itself is in need of some TLC. So, I pressure-washed it, scraped off some of the old flaking ablative, and repainted it.
Before.....

....and After
I also had to clean barnacles from around and on the transducer face. That was a bit more delicate work -- god forbid I break the thru-hull device! I picked up some special anti-fouling transducer paint ($15), which can be applied directly to the sensor's face.
That cleaned up nicely....
Strengthening My Top
My other major repair involved the cabin top. When I bought the boat a few years ago, it already had some cracks or "alligatoring" in several areas of the deck. These have long been a nagging concern to me, although I continued to hope that they were merely superficial and posed no structural threats. After all, a wet balsa wood core would mean a big and costly repair job. "It is known." When I finally checked it more carefully this spring, tapping with a plastic-head mallet revealed several areas suffering from delamination and perhaps even water penetration. Even without a moisture meter it was clear that something needed to be done.

Cracking on the cabin top around the mast step....
Ed, my boat guy, advised that to re-do the deck, or even just the cabin top, would be such an expensive job that I would never get my money back if I one day sold the boat. He knows I can't afford a newer, bigger boat (yet), as much as I would like one, so he mentioned that I try an alternative fix. He emphasized this was something he would never do to a client's boat, yet suggested that it just might extend the boat's life if I could strengthen the deck around the mast step to support the stress on the rig when it was under load. The plan called for drilling a series of 3/16" holes, about three to four inches apart, and injecting them with epoxy fill to harden the deck.

First, I drilled holes and poured in some acetone to dry out the wood underneath....
I mixed more of Ric's epoxy and, using plastic syringes from West Marine, injected the epoxy filler into the holes.

The epoxy overflowed onto the cabin top, and I had to wipe it up with a rag soaked in acetone....
Left with this rather ugly-looking mess, I now faced the prospect of painting the cabin top. But that, it seemed, was prohibitive -- in terms of cost, time, energy, interest, and skills. I am still not sure that my "drill-and-fill" repair job adequately fixed the problem. Perhaps I will be obliged to rip open the cabin top next year and re-do it properly. In that case, painting the deck seemed imprudent at present. Instead, I opted to buy a few yards of non-skid adhesive ($50) and cover the area where I had drilled. We will see what Ed has to say about that when he assists with my launch and rig-up next week.

Several strips of adhesive non-skid surface to cover the mess and pretend it is not there....
I still don't know how effective this half-assed 'drill-and-fill' repair job was. The Admiral has already declared her lack of faith in my handiwork, and her anxiety over the mast ripping out the cabin top one day while we are out sailing. Stay tuned for updates.....
No comments:
Post a Comment
I welcome your comments and suggestions....